Selected Items
Total {$ shopCartTotalAmount $} pcs
Selected Items
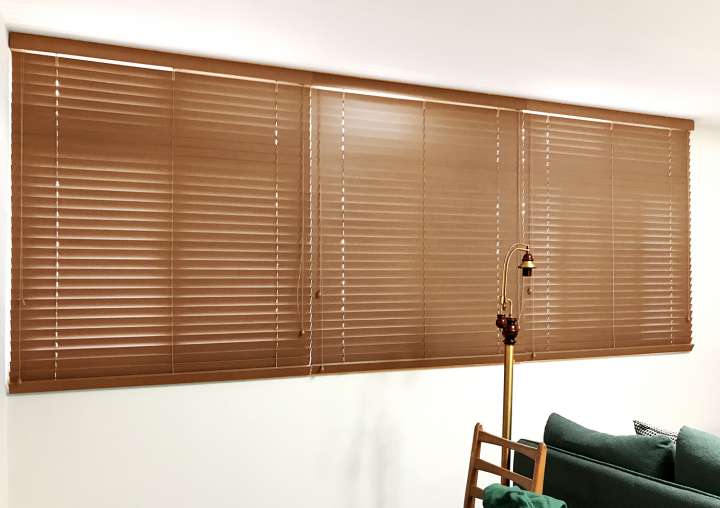
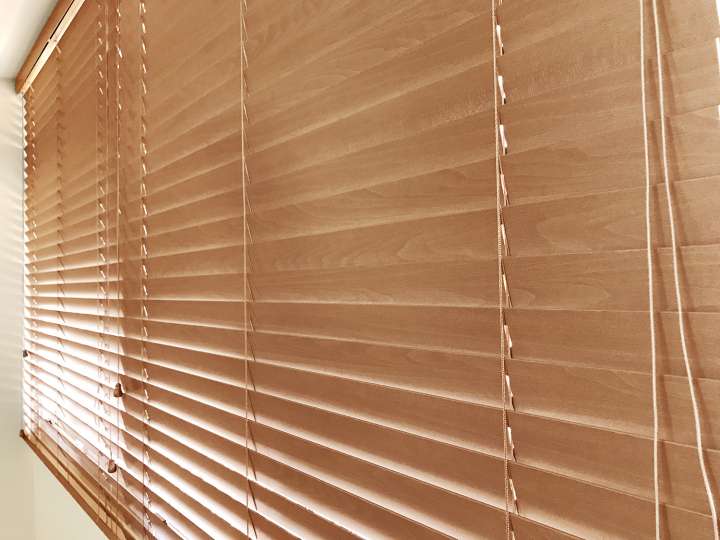
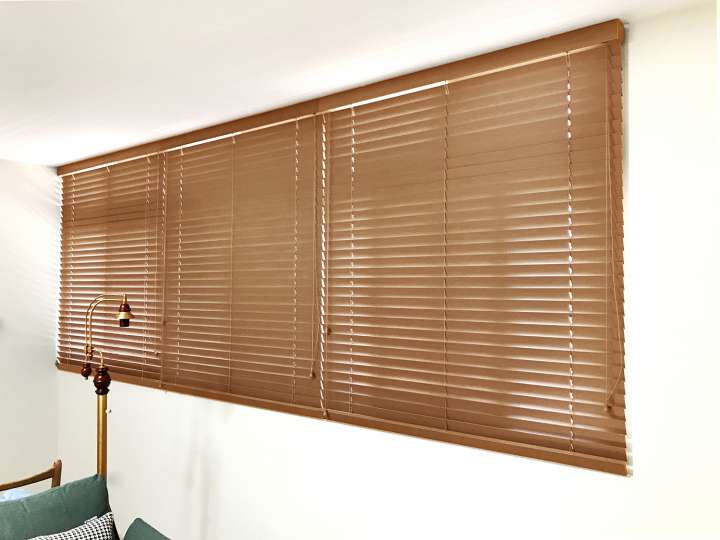
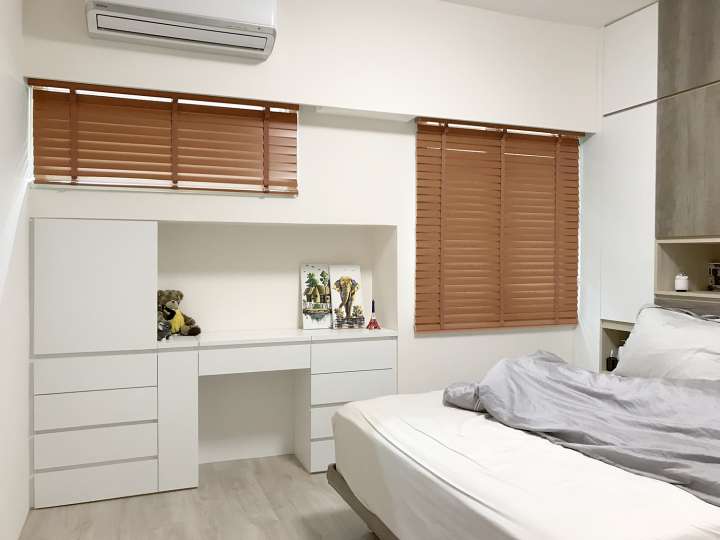

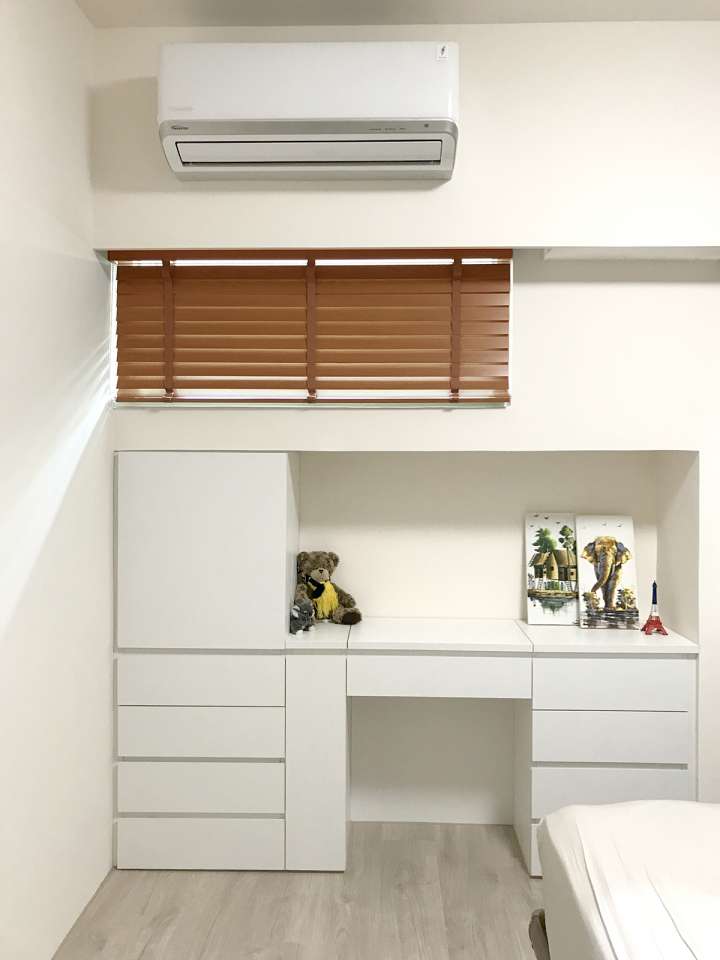


Printed wooden grains gives simple and warm atmosphere with natural and plain texture. Just like wander in the woods.
More made to measure Venetian BlindsInsert sizes for an estimate: NTD {$ formatPrice(pre_calc_price) $} up {$ formatPrice_currency(pre_calc_price) $}
Width
cm
Out of range
Height
cm
Out of range
Customizable size range:
Width: {$ size_range.width.min ? size_range.width.min : '' $}
{$ size_range.width.min && size_range.width.max ? ' ~ ' : '' $}
{$ size_range.width.max ? size_range.width.max : '' $} cm
{$ size_range.width.max ? '' : 'Above' $}
|Height: {$ size_range.height.min ? size_range.height.min : '' $}
{$ size_range.height.min && size_range.height.max ? ' ~ ' : '' $}
{$ size_range.height.max ? size_range.height.max : '' $} cm
{$ size_range.height.max ? '' : 'Above' $}
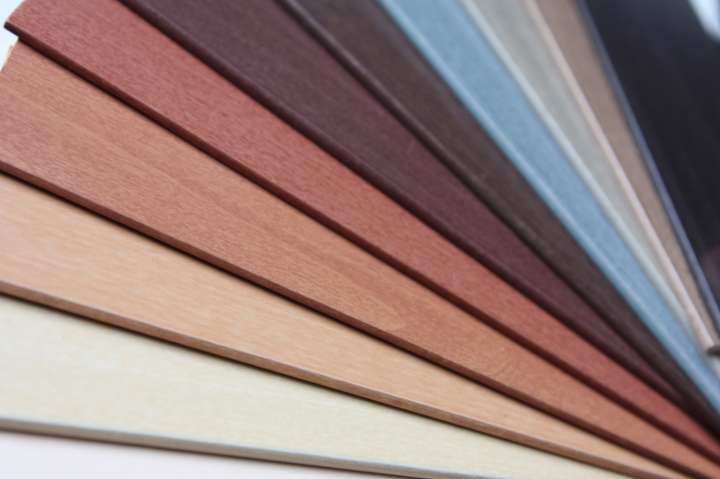
Colors:
Delete a swatch
Get a swatch
TK50F - Teak(On Sale!)
Levels of Difficulty
Average
[Sizes] Including headrail hardware
Custom-made: Can be customized within 45~270cm(W)× 300cm(H)
Slat width: 50mm
[Material] Slat – Painting on wooden slat surface. Headrail – Alu. coating
[Cleaning] Non-washable on the slats. Use a duster, dry cloth or vacuum cleaner. For severe stain, wipe with damp cloth.
■ Complete installation instructions and components attached
■ Headrail valance of identical slat material attached. Decorate the metal headrail for integrated beauty.
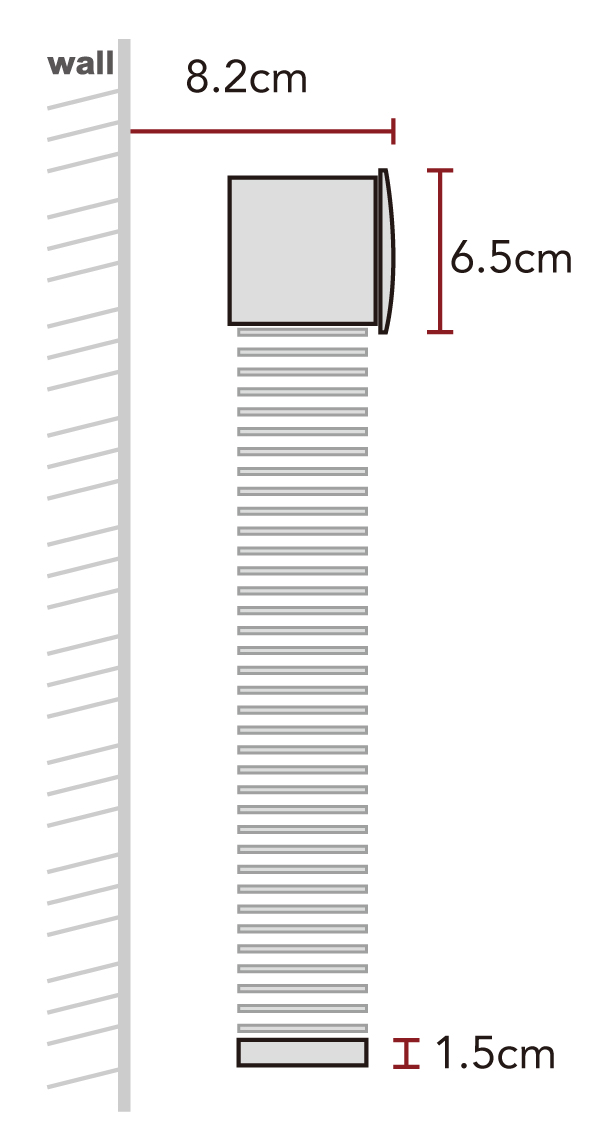
■ Brackets and hardwares are included in the blind. The total thickness after installation is about 8.2 cm.
■ If the blind is installed in the curtain box or notch, the inner depth should be at least more than 10 cm for smooth installation.
■ The covering area indents 0.2cm from left and right sides. It almost aligns with the headrail.
1. Ladder Cord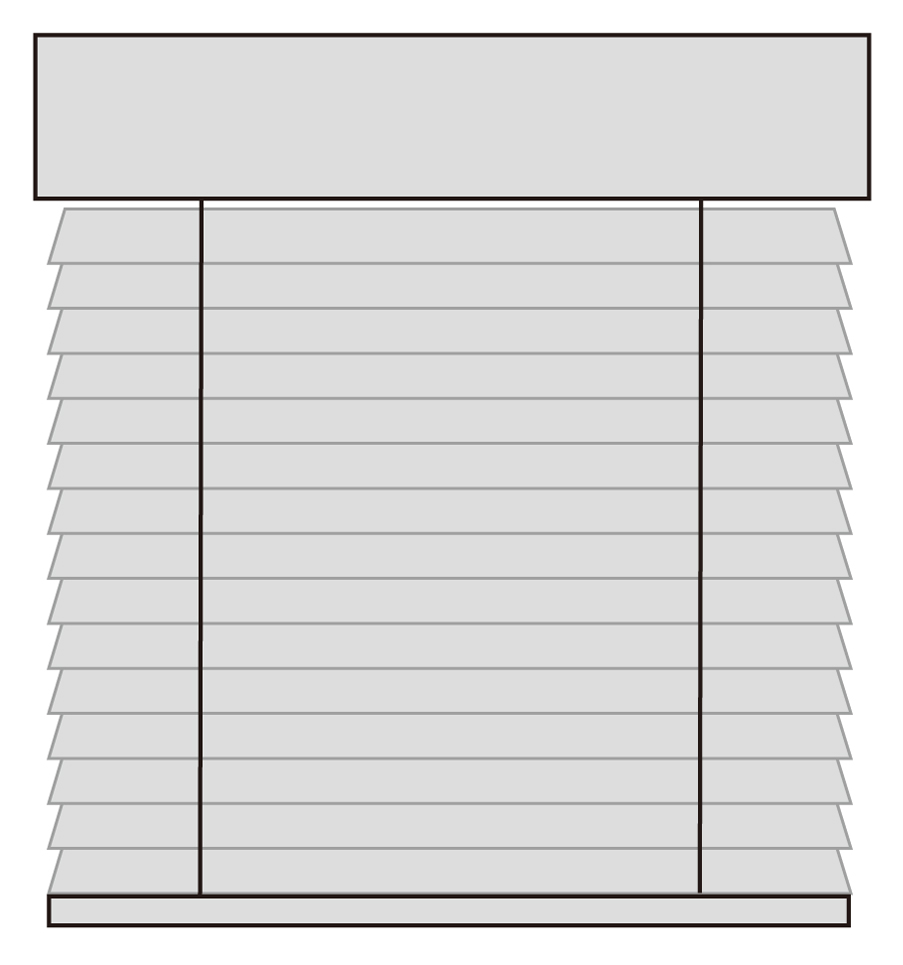
2. 25mm Ladder Tape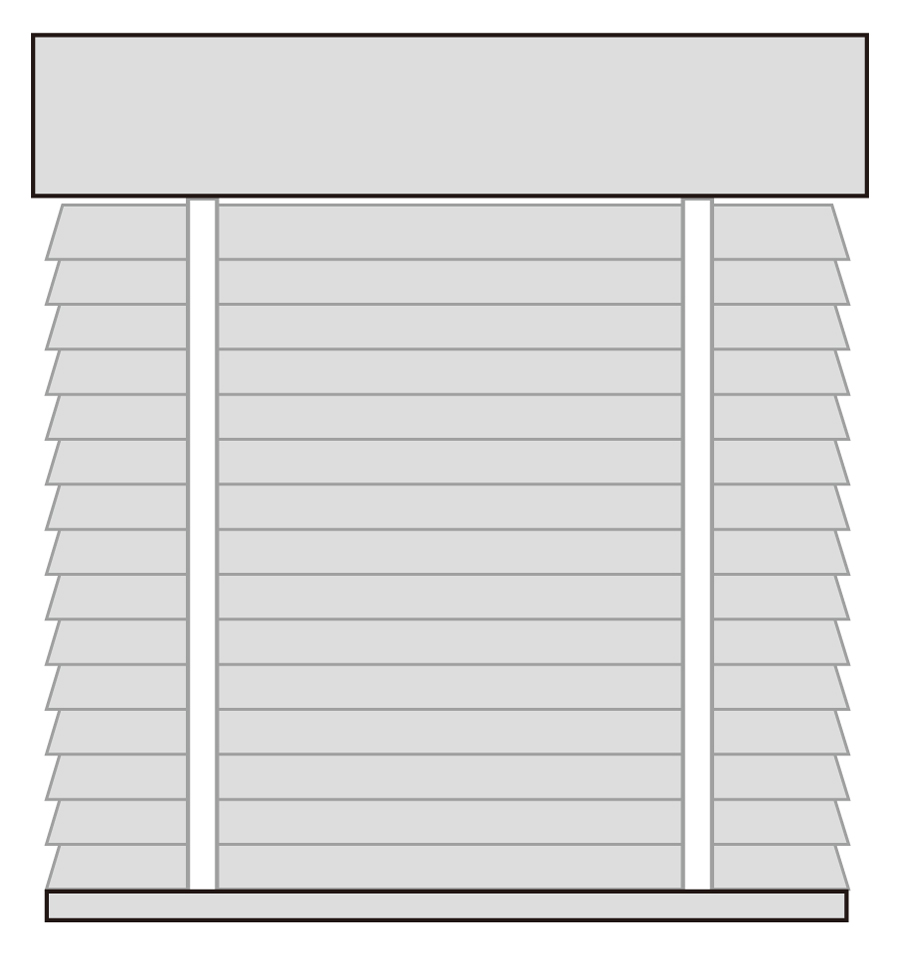
3. 38mm Ladder Tape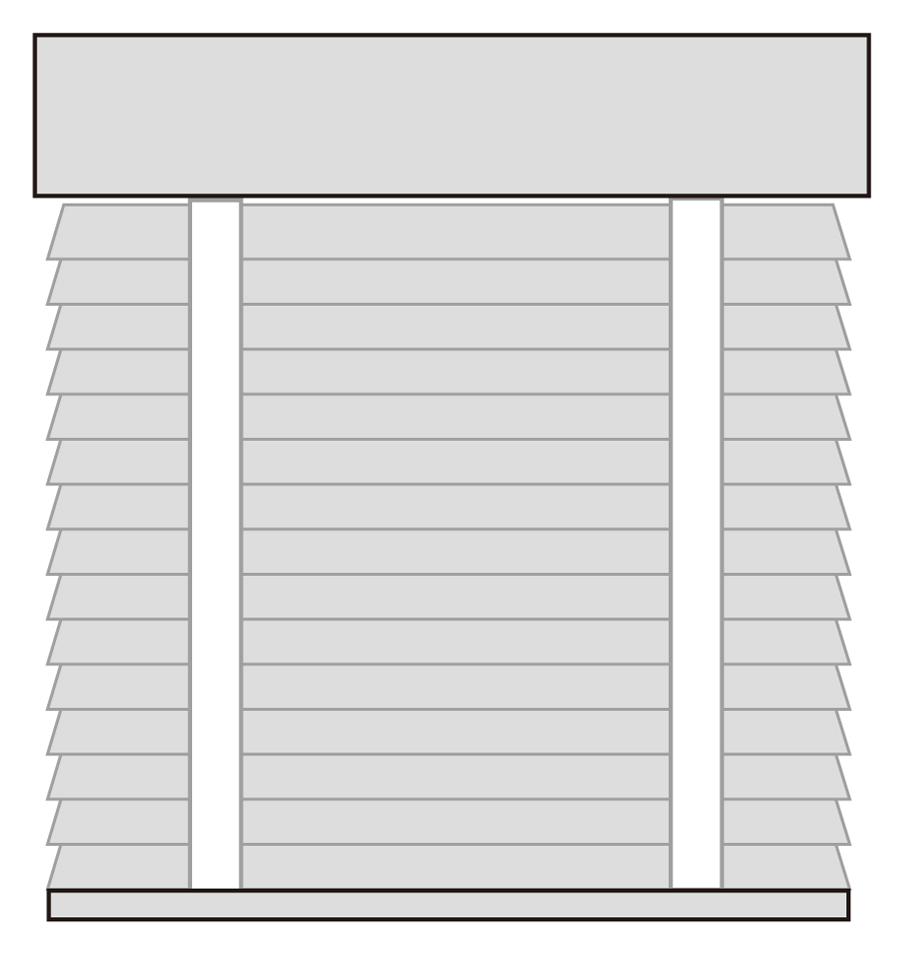
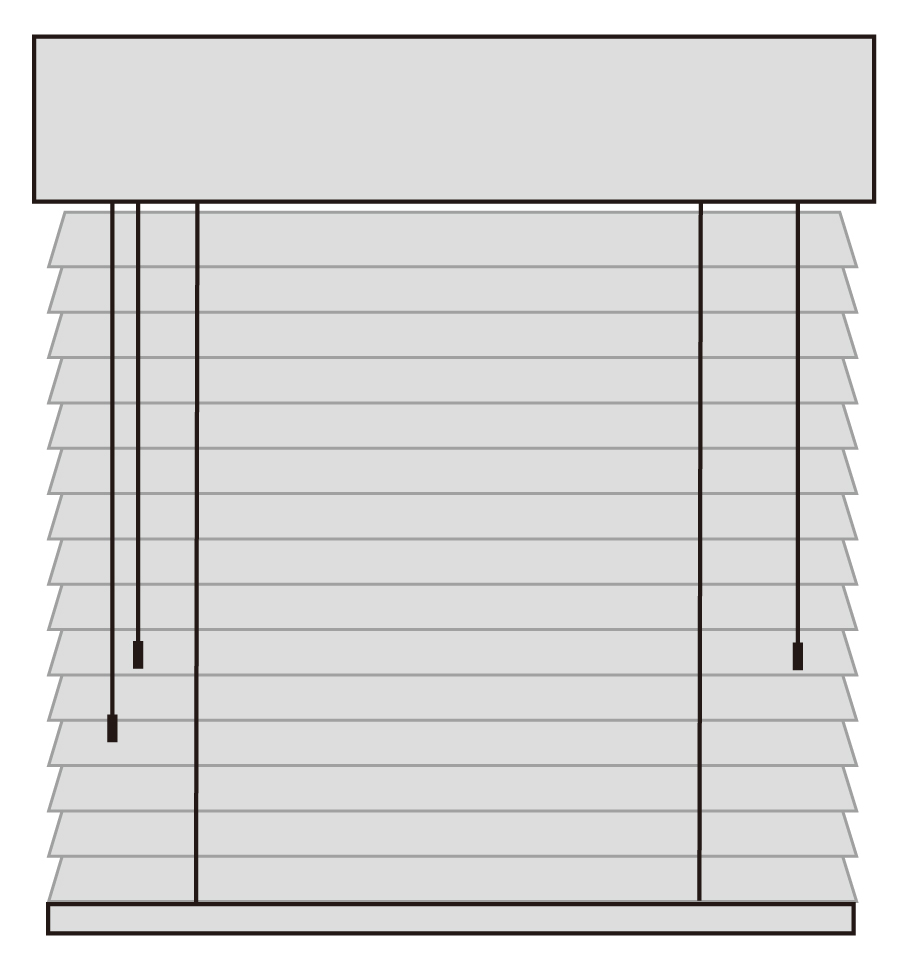
All kinds of slats/ pulling cords/ ladder tapes/ tassels.
Apart from standard colors, customers are free to match their own colors to pursue and create your own personal and unique brilliance. 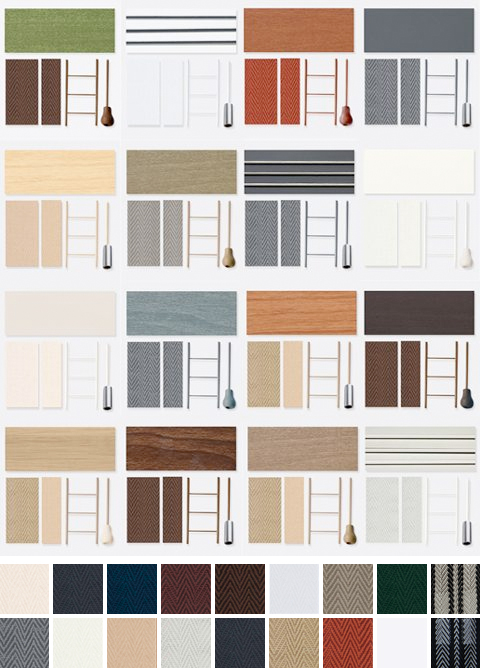
■ Metal Tassel--Metallic S Tassel, Zinc Alloy, One-piece, to replace the standard wooden tassel
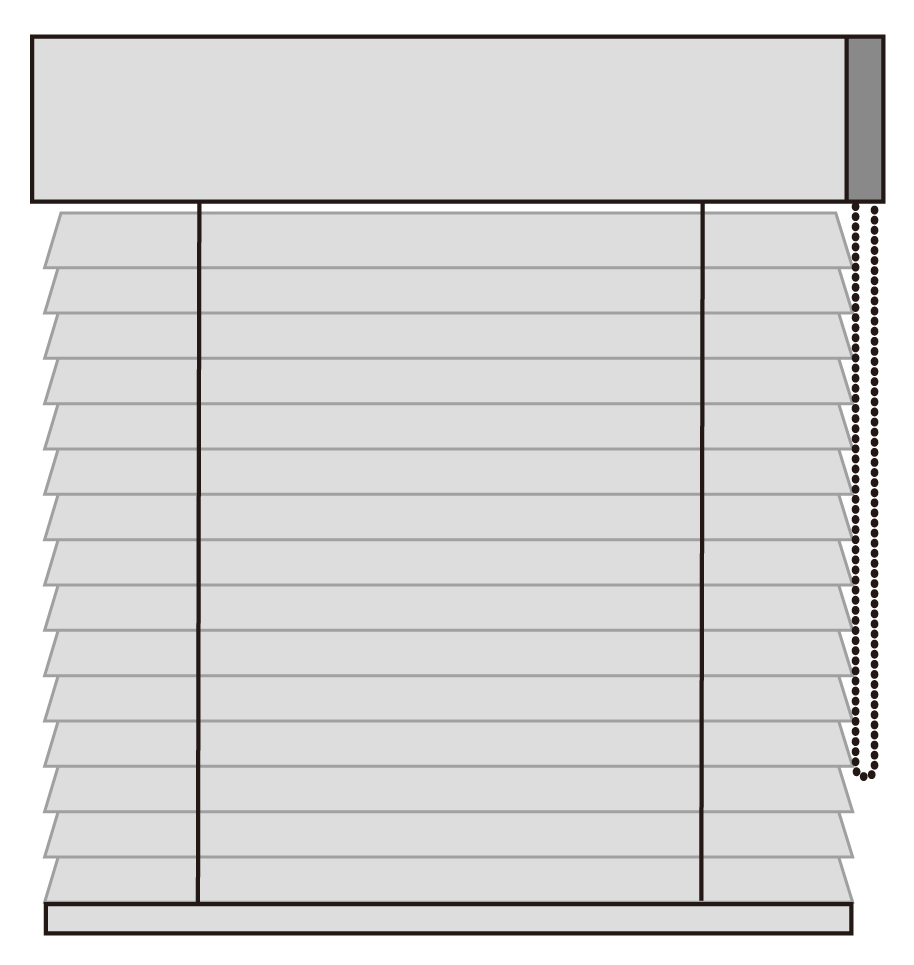
■ Ballchain Loop-Choose plastic ballchain or Metallic Ballchain
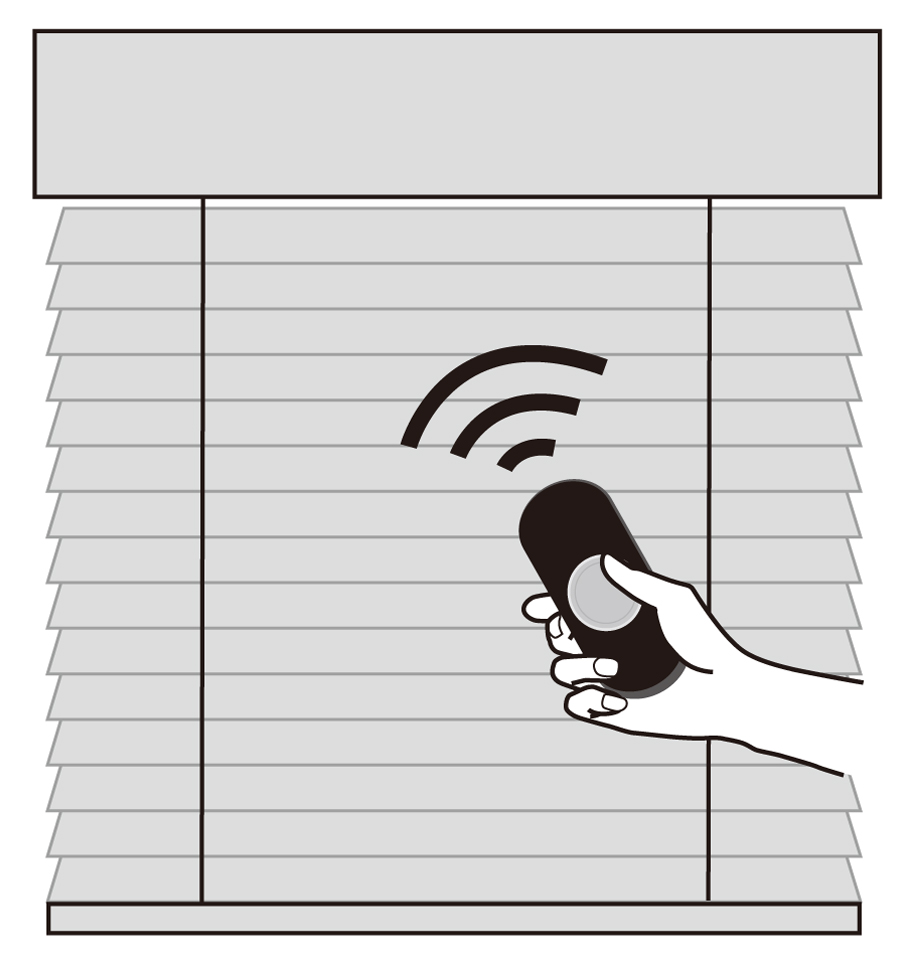
■ Motorized Remote Control-Only with pulling cord, minimum customizsed width 80cm
Decide which way you'd like to install your curtain, inside mount or outside mount. Measure by the following instructions:
Inside Mount
■ Install within the window frame. Fit in the window frame.
■ Simple and smooth outlook. Reduce the area of covering window.

STEP 1:Measure the in frame width
Please measure positions of left, middle, and right. Write down the minimum figures of these three, and that is the blind width.
STEP 2:Measure the in frame height
Please measure positions of left, middle, and right. Record the maximum figures of these three, and that is the blind height
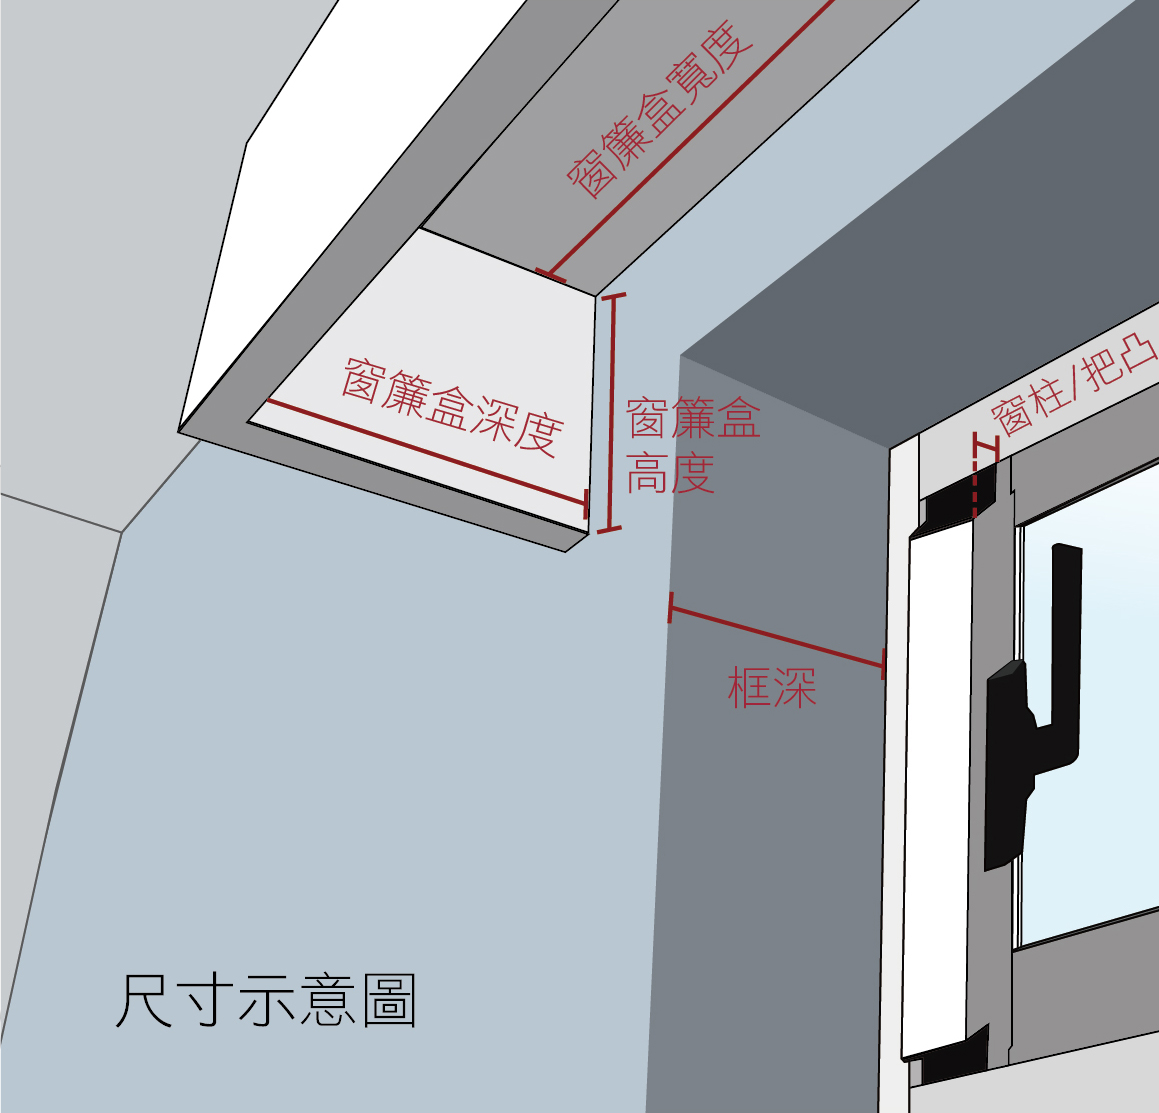
STEP 3: Measure the depth of window frame & the thickness of handle bar exceeds window frame.
Depth of window frame — thickness of operating bar exceeds window frame ≧ 8cm, the blinds can fit in the frame.
■ Minimum size unit: 0.5cm
■ The shape of window may not be vertical and level. It is suggested to measure three positions of height and width to avoid
unseccessful installation.
■ Reduce 0.5~1cm is suggested for customized width. This is to leave some space for possible alteration in installation work.

■ The surroundings of window has to be completely flat and no obstables around when deiciding window sizes.
■ Sizes shown on the products in the shipment are the complete sizes including systems and components.
■ Tool: A ladder, an electric drill (with 6mm tail), a hammer, electric screwdriver, a measuring tape, a level and a pencil.
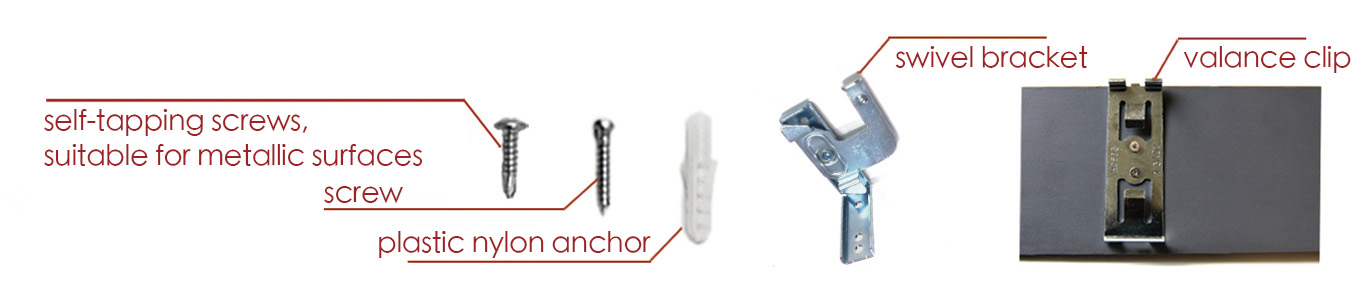
■ Components: Self-tapping screws, normal screws, plastic nylon anchors, safety hook, valance clip.
Steps:
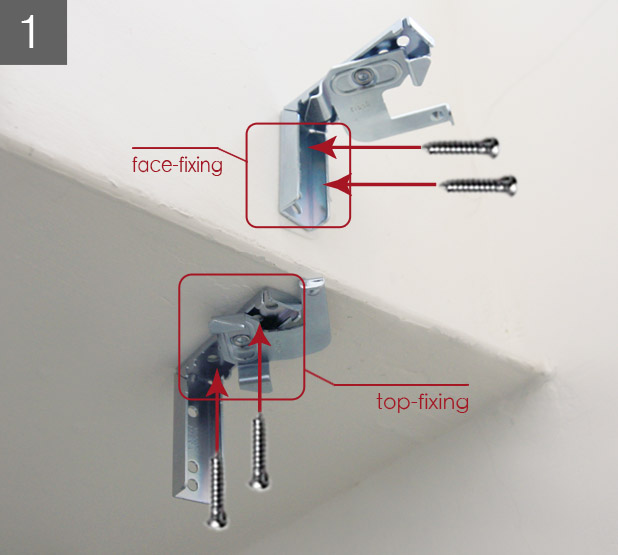
1. Decide the method of fitting brackets: Face-fixing or Top-fixing.
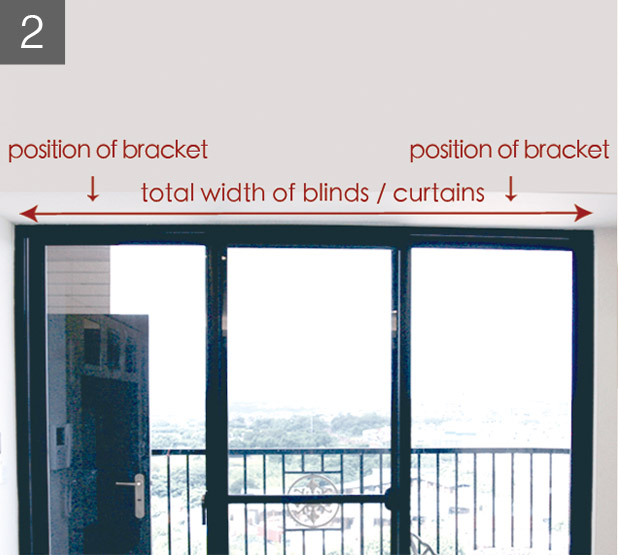
2. Mark screw holes to fix support bracket. Make sure that they are leveled.
* Avoid placing the bracket onto the parts of headrail and hinder operation of the blinds.
* 3 to 4 brackets might be needed for wider products. The distance between these brackets should be even to avoid uneven weight.
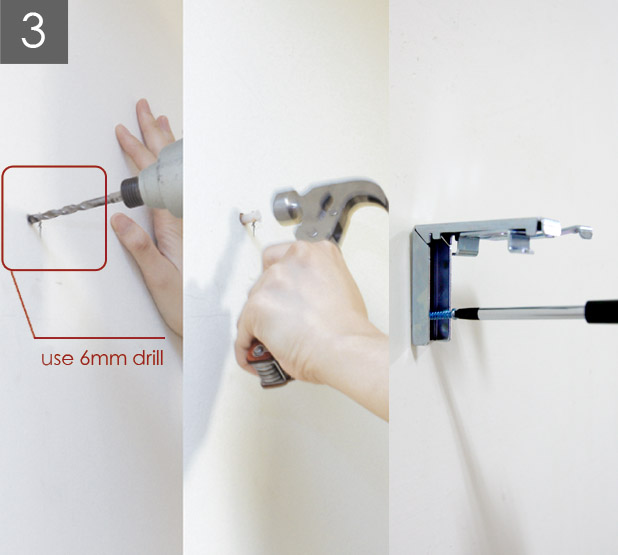
3. Drill at the reference mark, nail plastic nylon anchors into the wall and secure the mounting brackets.
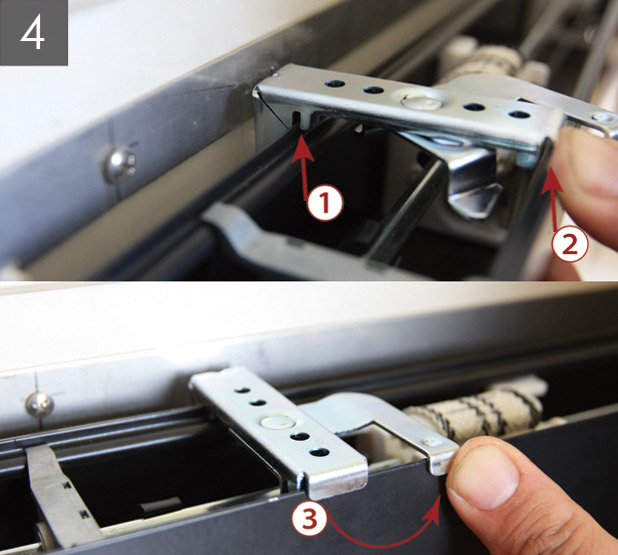
4. Follow the illustrations to secure blinds onto the brackets.
[1] Push up the side facing the window and snap into the bracket.
[2] Snap the front side into the bracket.
[3] Fasten the swivel bracket in counterclockwise direction
* To avoid blinds from falling, make sure the headrail is securely locked.
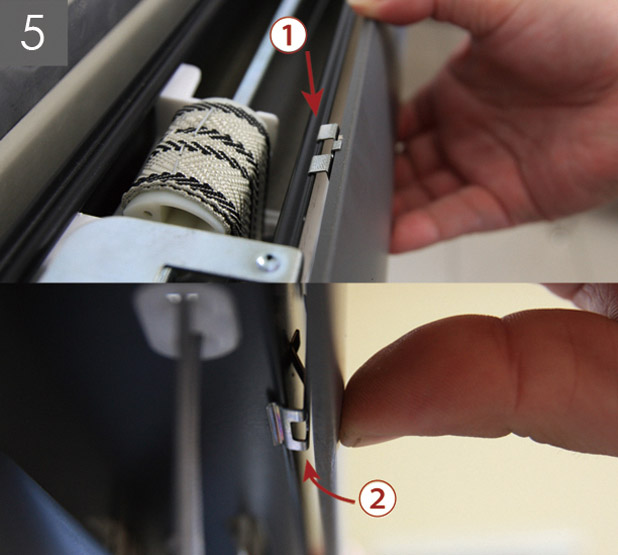
5. Follow the illustrations to click valance clip onto the brackets.
[1] Place valance onto the upper side of headrail.
[2] Push the lower part of the valance until it is securely snapped.
* Valance installation is optional based on the deco or actual environment.
* Valance removal is difficult after snap catch. Make sure the installation position before start.
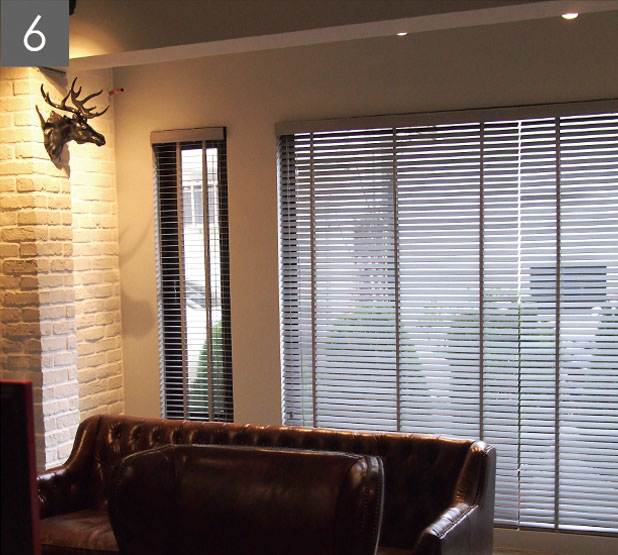
6. Installation complete
* Notice: Keep children away from accessories, pulling cords and slats. Any installation question, please contact MSBT staff for assistance.
* Attachment: Wood venetian blind Installation instruction A4 >> Download/Print
Warranty
• Unpack and check product conditions upon delivery
• Our on-site services or installation includes acceptance check and examination to ensure our service is well delivered.
• One-year warranty is granted under normal usages and for non man-made defects.
• When warranty period expires, maintenance or part costs will be charged after evaluation.
>>More After-sales Service
Searching For Ideal Curtains or Blinds?
MSBT provides many window coverings products and styles.
More Collection | ProductsRequest has reached the max q'ty
You’ve already ordered 20 pcs of swatches, including thoes in the shopping cart.